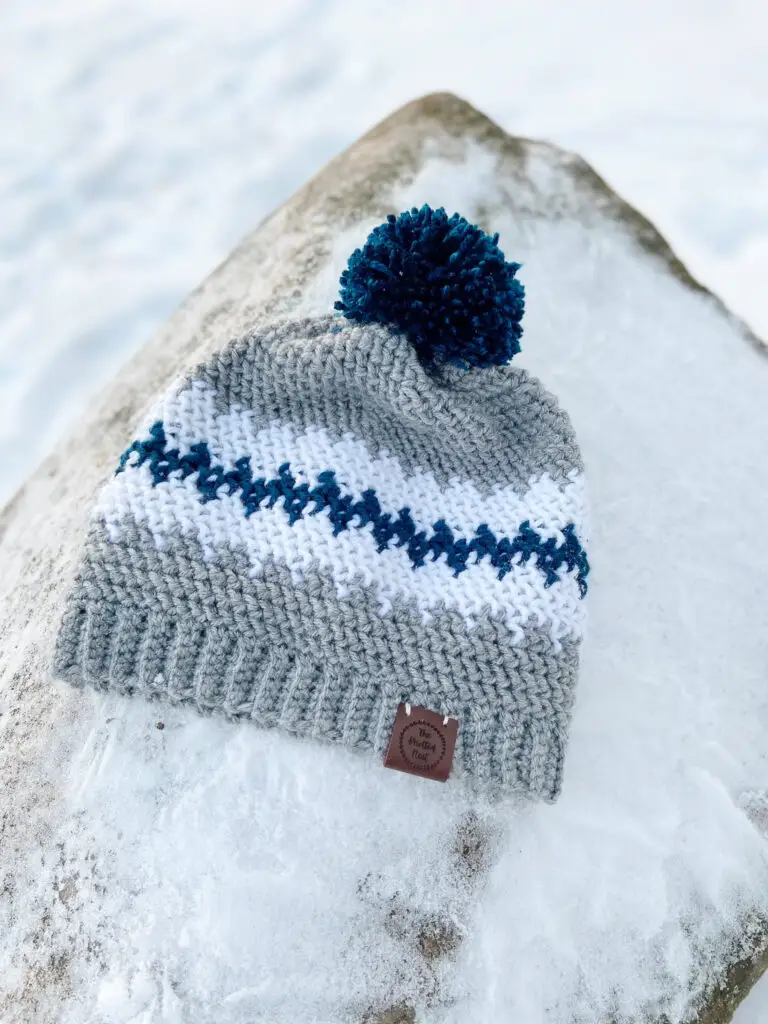
The Buddy Beanie: A Free Crochet Hat Pattern for Boys
Put a smile on your little buddy’s face with this crochet hat for boys! Read on for more about the inspiration for this hat (my two favorite 7 year olds) and a little bit about the construction and supplies you’ll need, or scroll down for the free pattern!
The Inspiration
Have you ever noticed that there aren’t a whole lot of crochet patterns out there geared towards boys?

Of course, you can make this beanie for anyone and everyone, but I wanted to create something a little on the boyish side for my twins who turned seven this month (!!!). I last crocheted hats for them when they were probably two so they were well overdue for an update (I did make them each a Striped Pom Pom Scarf last year so they haven’t been completely neglected, lol).

The boys each picked 3 colors and gave me the instructions that they wanted a “floppy hat with a squiggly stripe and a pom pom”….not sure if I nailed it, but they seem happy with the results!

Click here to Pin this post for later!
The Name
We did a little crowdsourcing to name this hat via Instagram and came up with The Buddy Beanie! It fits perfectly since my twins were the inspiration and they are best buds (despite having VERY different personalities)!
Construction and Supplies
I categorized this pattern as intermediate, but I think an advanced beginner should be able to tackle it with no trouble (don’t worry – I’ll walk you through the tricky parts!).
The hat is worked from the bottom up meaning that the brim is worked first, then turned 90 degrees so that you start the hat body by working into the ends of the brim rows. It’s easier than it sounds! The main stitch is the super simple but interesting herringbone half double crochet.
The pattern includes a chart for the colorwork portion as well as detailed instructions for how to change colors (I’ve also included a genius tip to avoid tangled yarn!). A little bit of decreasing at the top and you’re done!

The Sizing
This pattern is written for a child size (4-10 years), but general instructions are given for adapting the Buddy Beanie to different sizes.
The Pom Pom
Adding a pom pom is optional, but is it really?? Not according to my boys! If you have a pom pom maker – go for it! If not, I’ll show you how to make a full, fluffy pom (that won’t fall apart!) using a piece of cardboard. Or you can check out my detailed pom pom tutorial here.

The Yarn
Any worsted weight yarn will do for this project, but I went with Lion Brand’s Basic Stitch. It has become my new go-to for acrylic yarn. It’s soft, durable, works up well, and most importantly for this project, comes in tons of colors!
Ok, who’s ready to make a hat?!
Grab an ad-free, printable PDF of this pattern on Etsy or Ravelry!

“The Buddy Beanie” Crochet Hat for Boys Free Pattern
SKILL LEVEL
Intermediate – colorwork and decreasing are involved as well as working into the side of ribbing.
MATERIALS
- Yarn: A total of about 200 yards of worsted weight in 3 colors (less than one skein each) for the child (age 4-10) size. I used Lion Brand Basic Stitch yarn in:
- For Blue hat:
- Silver Heather = color A
- White = color B
- Steel Blue = color C
- For Orange hat:
- Charcoal Heather = color A
- Silver Heather = color B
- Pumpkin = color C
- Size G hook (4mm) for brim and size H (5.0mm) for body of hat.
- Scissors, Yarn needle
- 6” square of cardboard for making pom pom or pom pom maker.
DIMENSIONS
Child size (ages 4 – 10) measures 8” tall (without pom pom) and is about 19” in circumference at brim.
GAUGE
15 sts x 14 rows = 4” square in hhdc using size H (5.00mm) hook.
NOTES
- This hat is worked from the bottom up with the brim worked first. You will then turn the brim 90 degrees and work into the sides of the brim rows to begin the body of the hat.
- For the colorwork portion of this pattern, you will carry the unused color through the round to keep the same thickness throughout (see pattern for specific instructions).
- Tip: to keep yarn from getting tangled during color work, keep skeins on a tray or shallow basket and turn the basket clockwise 180 degrees at every color change.

- The Ch 1 and Ch 2 at the beginning of each row/round do NOT count as a stitch.
- This pattern is written for Child (ages 4 -10) size, but general instructions are given for adjusting sizing. See sizing chart:
| Bottom-Up Hat Sizing by Age | If head circumference measures… | …then make the brim of your hat this (number of rows must be a multiple of 3) | …and hat should be about this tall… |
| Toddler | 16-18 inches | 14-16 inches | 6.5-7 inches |
| Child (4-10 years) | 19-21 inches | 17-19 inches | 7.5-8 inches |
| Teen/Small Adult | 21 inches | 19 inches | 8 inches |
| Medium Adult | 22 inches | 20 inches | 9 inches |
| Large Adult | 23 inches | 21 inches | 9.5 inches |
- Special Stitches:
- Herringbone half double crochet (hhdc) – Yarn over, insert hook into next stitch, YO and pull up a loop (3 loops on hook), but also continue pulling through the next loop on your hook (similar to a slip stitch. 2 loops left on hook). Then, yo and pull through the two remaining loops on hook. Find a step-by-step tutorial here.
- To change colors – Begin st with first color. Stop with two loops remaining on hook, use second color for last yarn over and to complete the stitch.
- Herringbone half double crochet (hhdc) – Yarn over, insert hook into next stitch, YO and pull up a loop (3 loops on hook), but also continue pulling through the next loop on your hook (similar to a slip stitch. 2 loops left on hook). Then, yo and pull through the two remaining loops on hook. Find a step-by-step tutorial here.
- Herringbone half double crochet decrease (hhdc-dec)– Yarn over, insert hook into first stitch, YO and pull up a loop, but also continue pulling through the next loop on your hook (2 loops on hook), yo and insert hook into next st, YO and pull up a loop and continue pulling through next loop on hook (3 loops on hook), YO and pull through all 3 loops.
- Abbreviations:
- ch = chain
- blo = back loop only
- hhdc = herringbone half double crochet
- hhdc-dec = herringbone half double crochet decrease
- sc = single crochet
- sl st =slip stitch
- st = stitch
- yo = yarn over
PATTERN
The pattern is written for Child (ages 4 -10) size, but general instructions are given for adjusting size (see Sizing Chart in notes section).
Brim
With color A and a size G hook, Ch 7.
Row 1: Sc in 2nd ch from hook and in each ch. Ch 1, turn. <6 sc>
Row 2: Sc in blo in each st. Ch 1, turn. <6 sc>

Rows 3 – 69: Repeat Row 2. <6 sc>

Note: If you wish to adjust the size of your hat (see chart for sizing guidelines), adjust the number of brim rows, being sure your final number is a multiple of 3.
Fold brim in half lengthwise to form a circle.

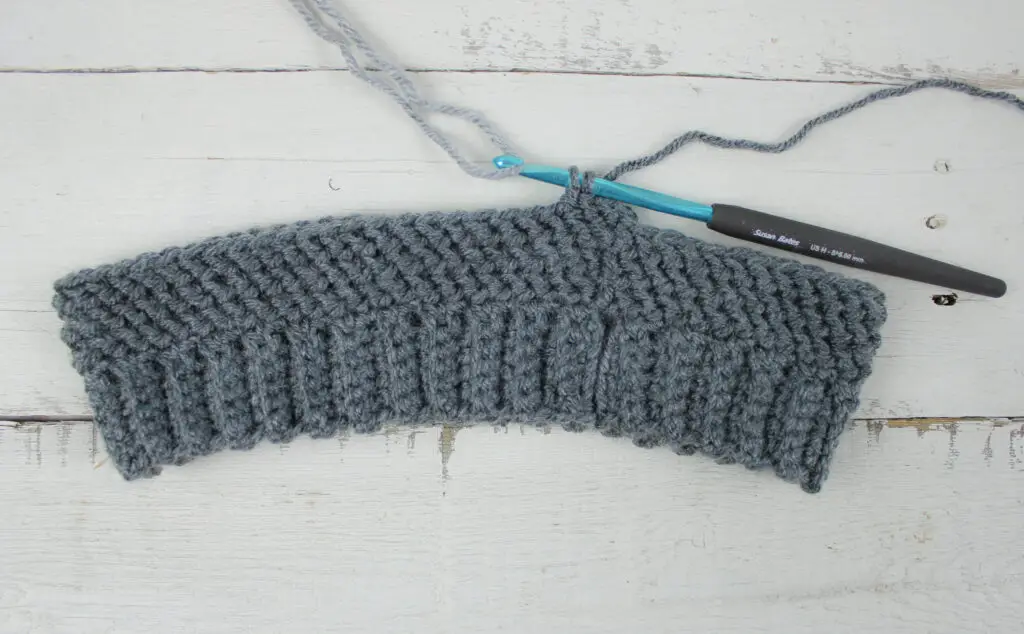
Ch 1 and sl st the two short ends together to join (for a less conspicuous seam, sl st through just the two outermost loops of each row). Then flip the brim inside out to hide seam, do not cut yarn.

Hat Body
Turn the brim 90 degrees. You will now be working down the sides of the brim rows. Each Row end counts as a “stitch”. Continue with color A , but switch to a size H hook. You will now be working in rounds.
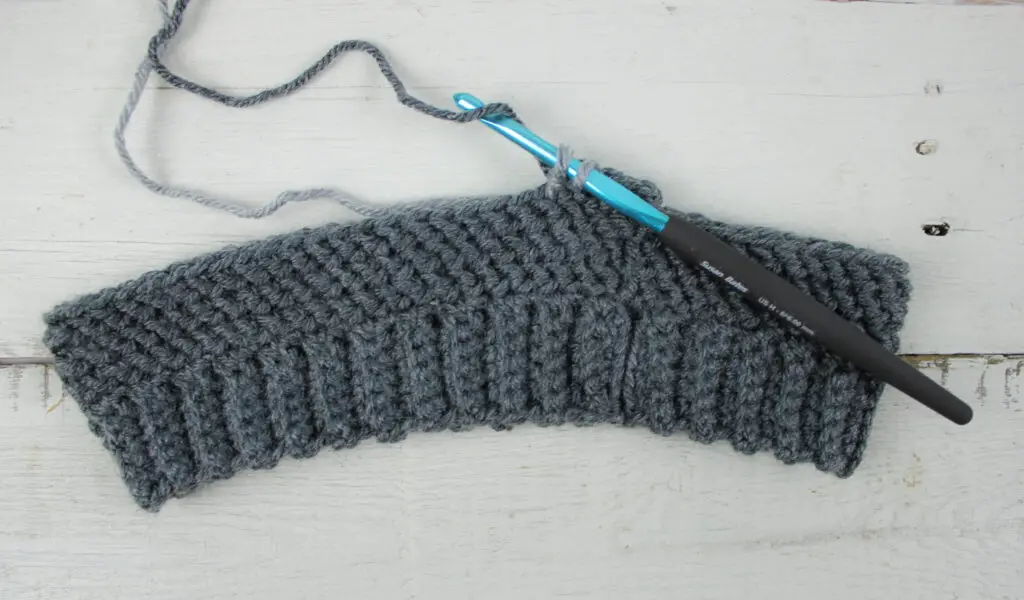
Round 1: Ch 1, sc along the side of the ribbing, placing 1 sc per row end. Join to the first sc with a sl st. < 69 sc>

Round 2: Ch 2 (does not count as a st), hhdc in each st around, sl st to first hhdc to join. < 69 hhdc >
Rounds 3-4: Repeat Round 2.
Sizing Note:
- For Toddler size, skip Round 4.
- For Teen/Small Adult size repeat Round 4 one extra time
- For Medium and Large Adult size repeat Round 4 two extra times.
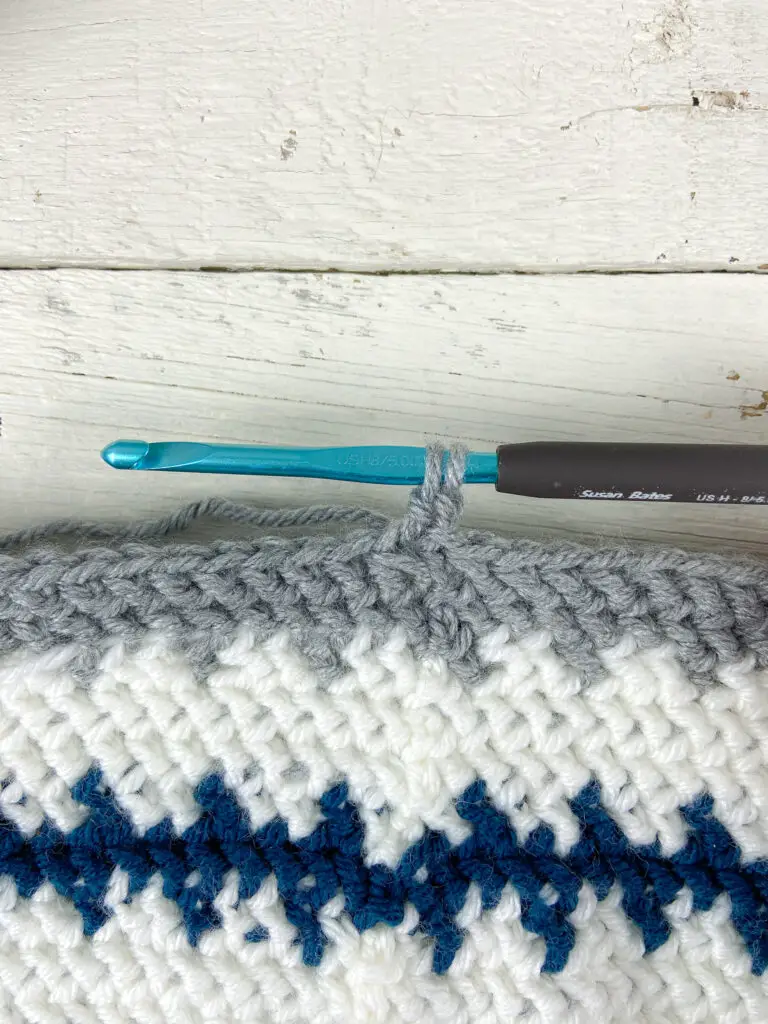
*Start of color work – carry unused yarn through the round. See chart for help.*

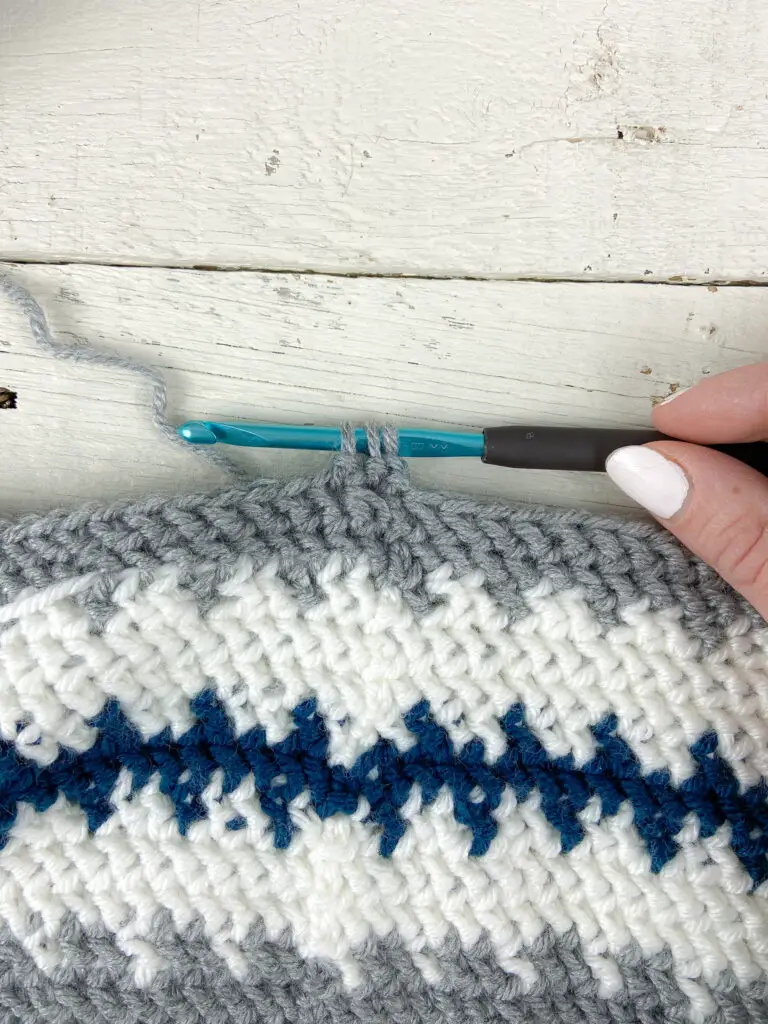
Round 5: (Still with color A) Ch 2, [1 hhdc in the next 2 sts, (do not complete 2nd hhdc, stop with 2 loops on hook and pull through with color B), use color B to make 1 hhdc (do not complete, stop with 2 loops on hook and pull through with color A)]. Repeat inside [ ] until the end of the round. At the last hhdc (should be color B), complete the st with color B and use color B to sl st to join the round. Carry color A up to the next round. <69 hhdc>
Round 6 -7: (With color B, carrying color A) Ch 2, 1 hhdc in each st, sl st to join. <69 hhdc >
*Drop color A here. You can cut color A and reattach later or leave attached and just pull it up when needed since the jump will be hidden on the inside of the hat.
Round 8: (with color B) Ch 2, hhdc in same st, but stop with 2 loops on hook and pull through with color C, 1 hhdc with color C, but complete with color B, [1 hhdc in next 2 sts with color B, complete 2nd hhdc by pulling through with color C, 1 hhdc using color C, but pull through with color B]. Repeat inside [ ] until the end of the round, carrying unused color. Sl st with color C to join the round.
Round 9: (Using color C, carrying color B) Ch 2, 1 hhdc in each st, sl st with color B to join the round.
Round 10: Repeat Round 8, sl st with color B to join the round. Fasten off color C.
*Pick up color A here.
Round 11: (With color B, carrying color A) Ch 2, 1 hhdc in each st, sl st to join the round.
Round 12: Repeat Round 11, sl st with color A to join the round.
Round 13: Repeat Round 5, sl st with color A to join the round. Fasten off color B.
Round 14: (Using color A for remaining rounds) Ch 2, hhdc-dec over the first two sts, 1 hhdc in each st until you reach half way around, 1 hhdc-dec, 1 hhdc in remaining sts. Sl st to join the round.
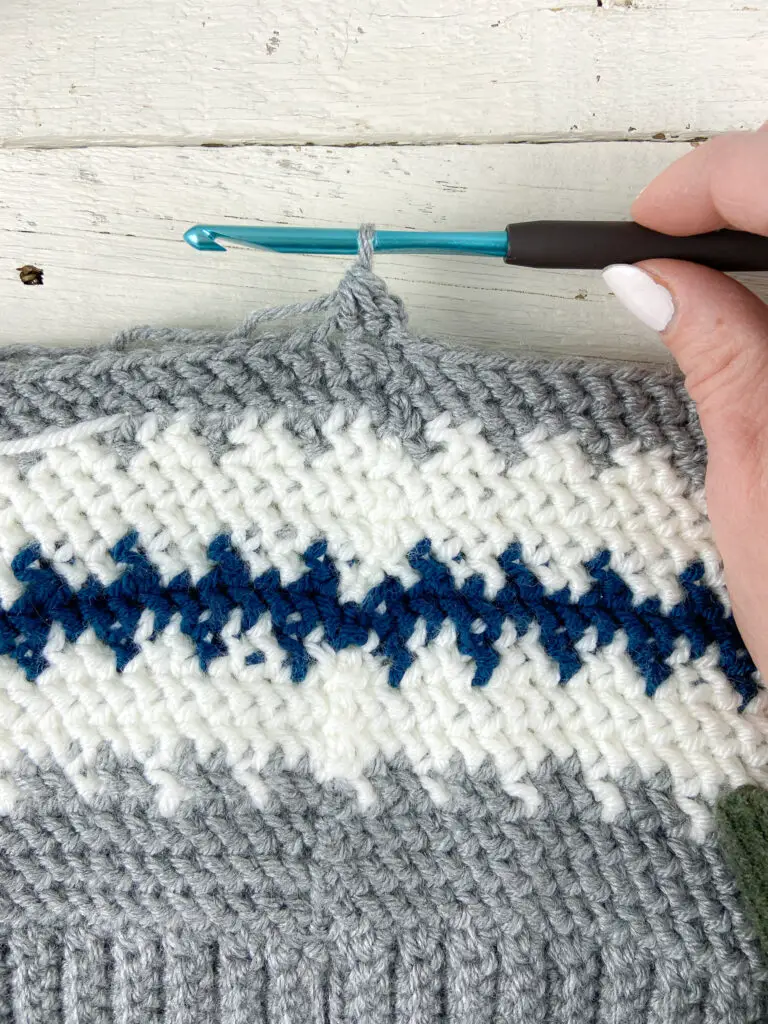
Rounds 15 -17: Repeat Round 14.
Rounds 18-21: Ch 2, hhdc around, evenly spacing 4 hhdc-decs within the round. Sl st to join.
Round 22: Ch 2, hhdc around, evenly spacing 6 hhdc-decs within the round. Sl st to join.
Round 23: Ch 2, hhdc around, evenly spacing 8 hhdc-decs within the round. Sl st to join.
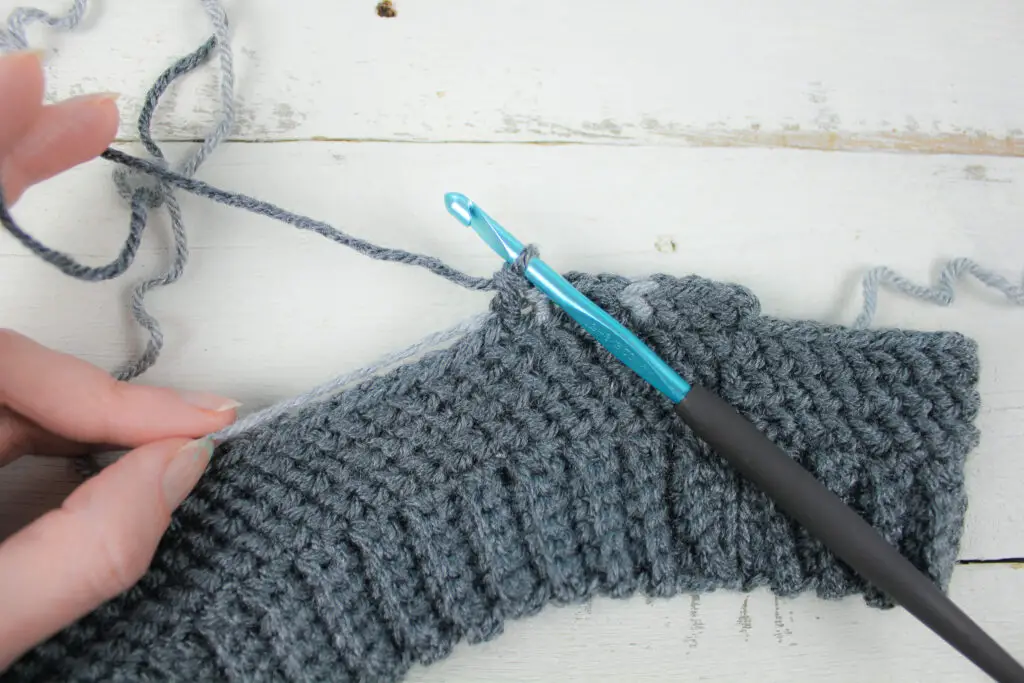
Fasten off yarn but leave a long tail for closing top of hat. Weave in any other ends.
Closing Top of Hat
- Thread the long tail on to a yarn needle. Begin weaving your needle in and out of each stitch around the top of the hat (Tip: I think it looks neater if you only sew through the outermost loop only).

- Every few inches, pull to cinch the opening. When you get back to the beginning, pull tightly to close the gap.

- I like to pass the needle back and forth over the opening a few times to secure. Tie off and weave or tuck in your ends.

Your hat is finished! Add a pom pom for extra cuteness! (use a pom pom maker to make a 4” pom or see instructions below for a DIY version)
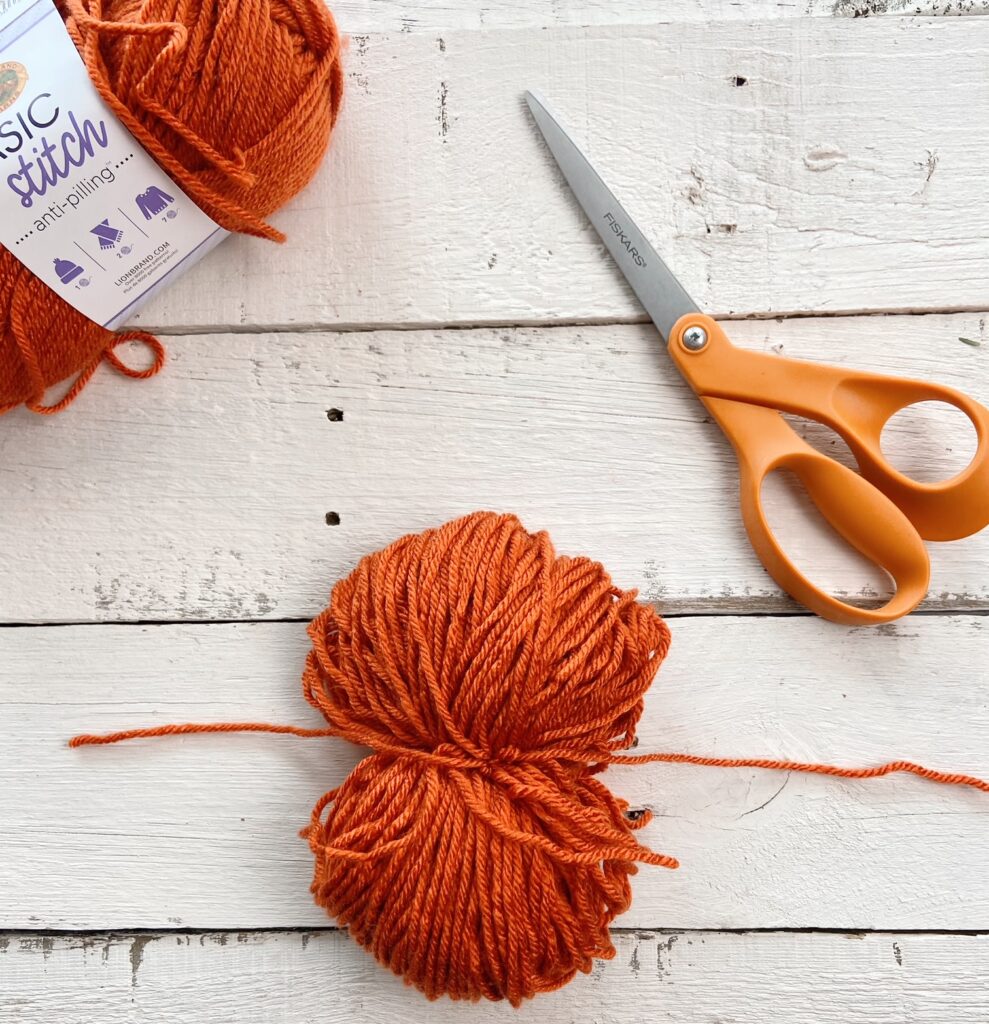
DYI Pom Poms
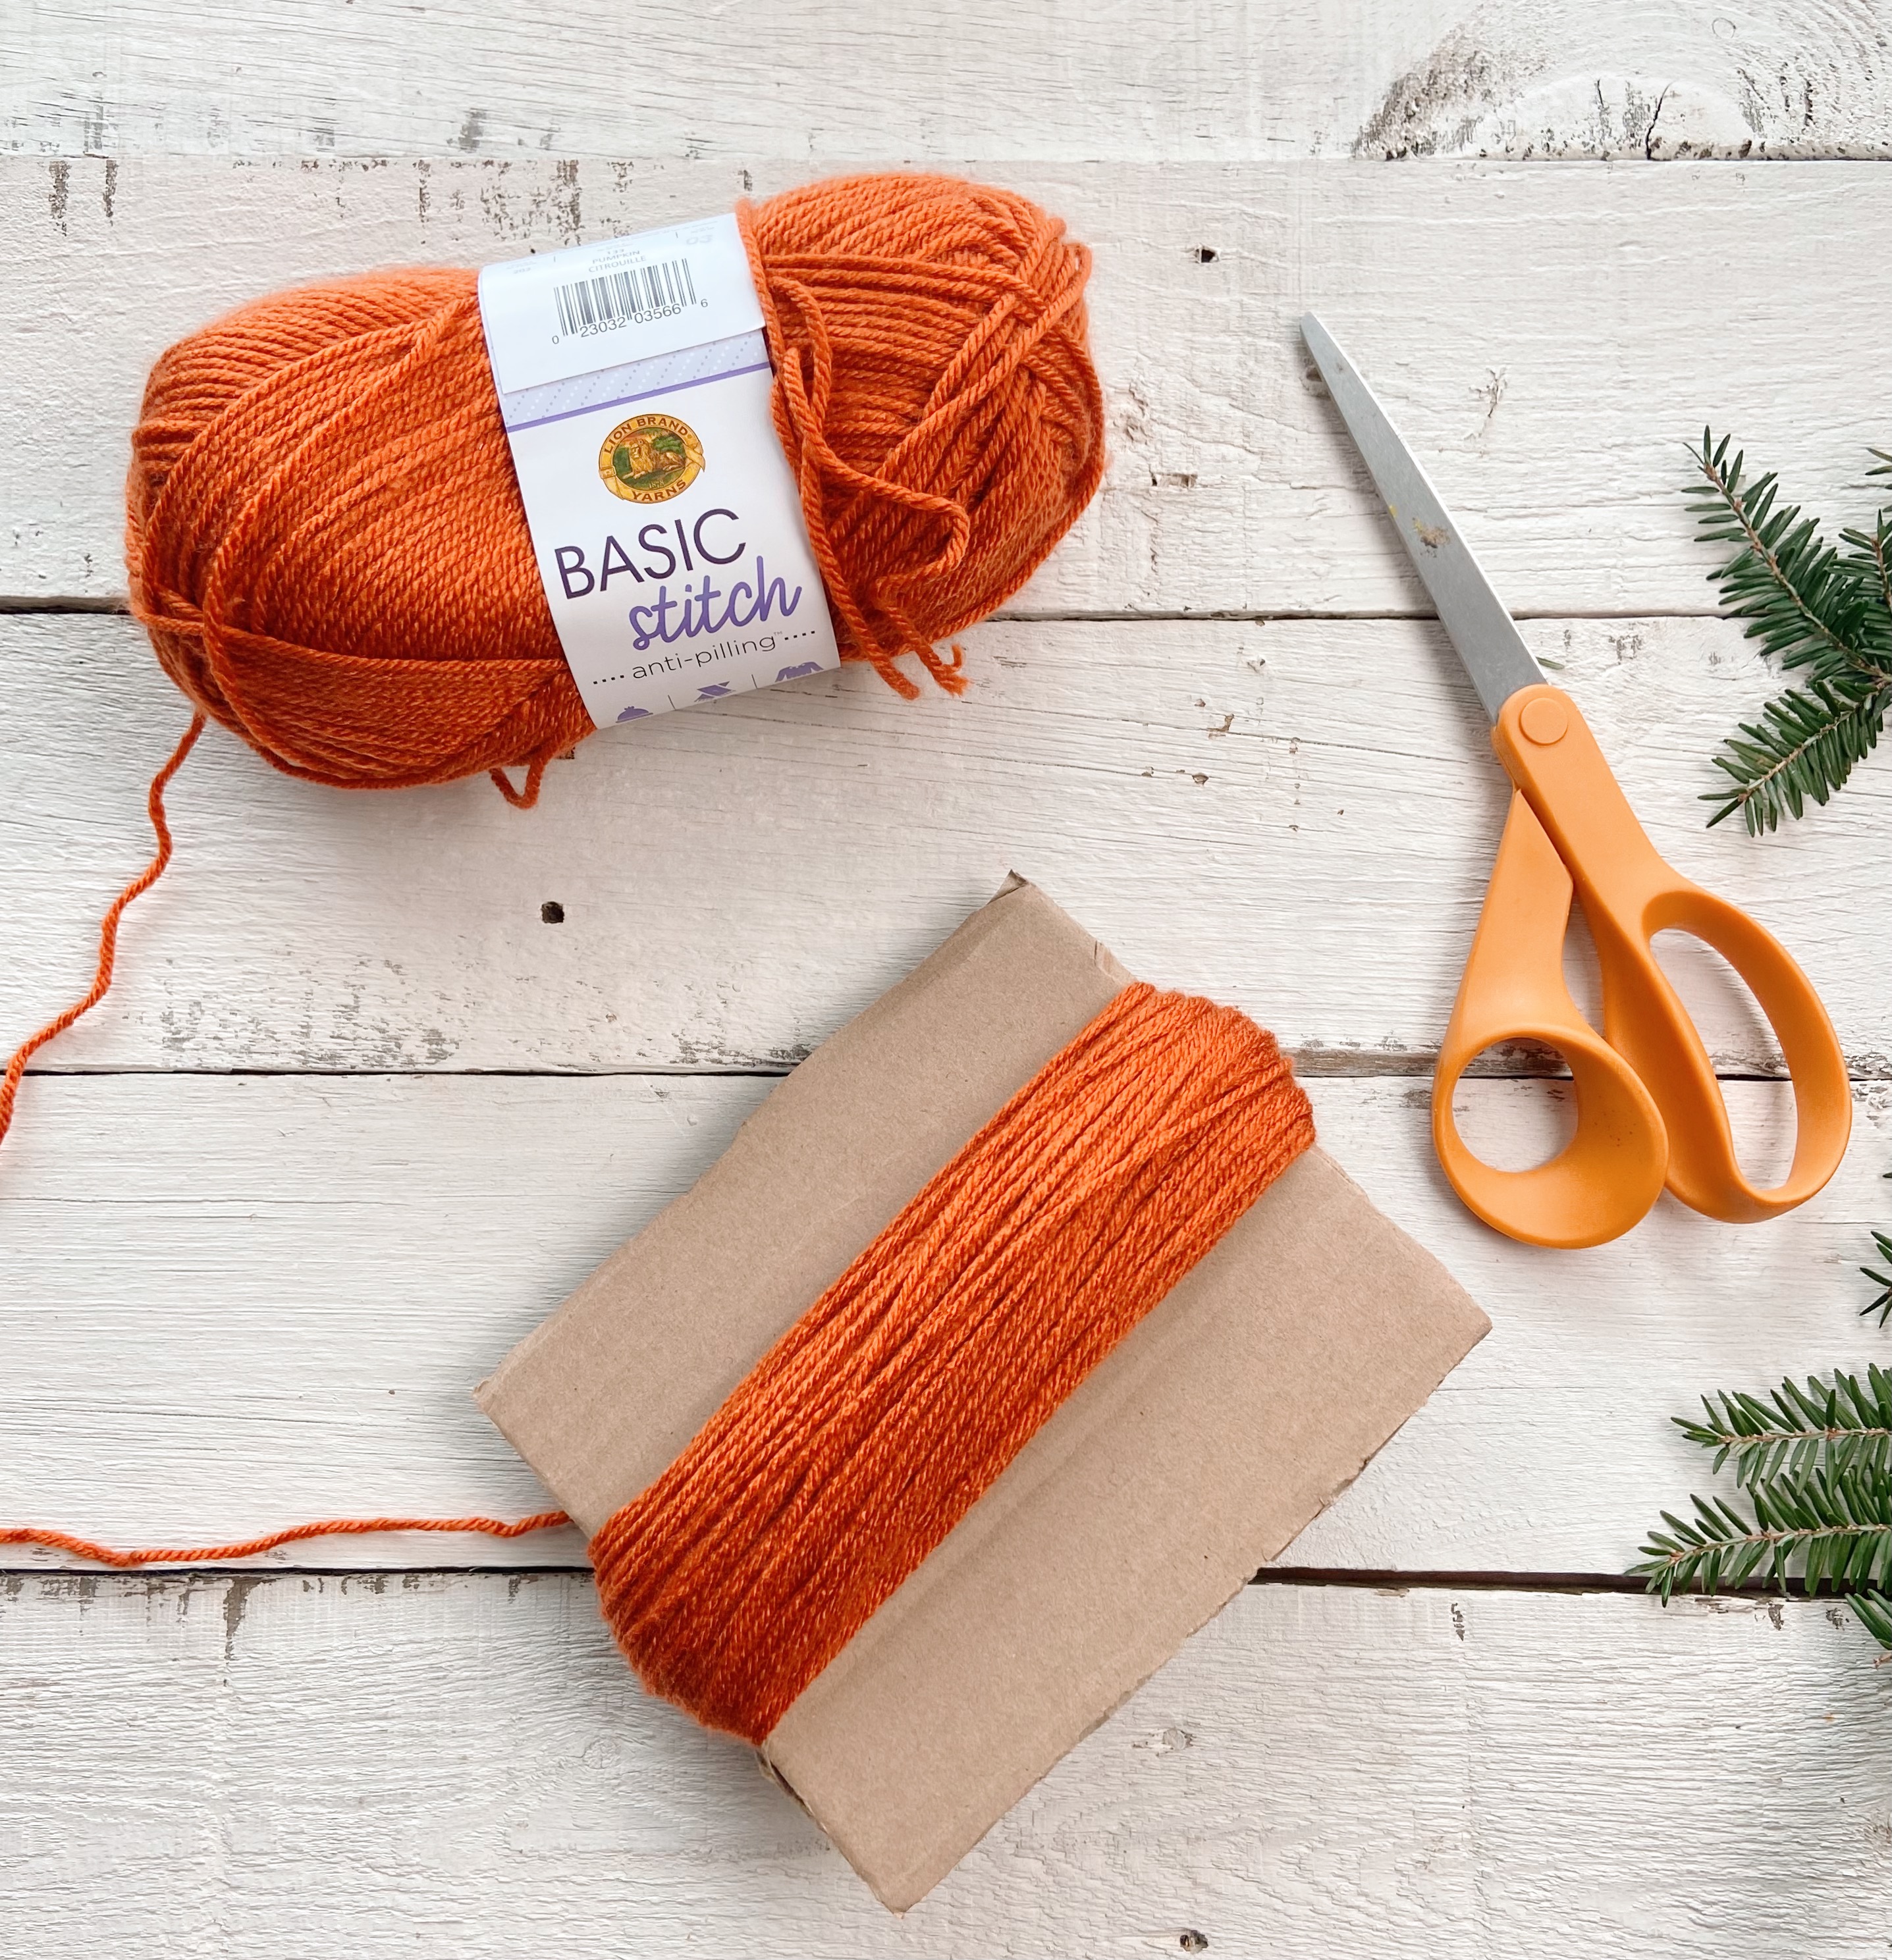
To make a 4” pom pom, you’ll need: about 50 yards of corresponding color yarn, a 6” square piece of sturdy cardboard, sharp scissors, and a yarn needle. Find a detailed tutorial for DIY pom poms here.
- Wrap yarn around the square of cardboard about 180 times.
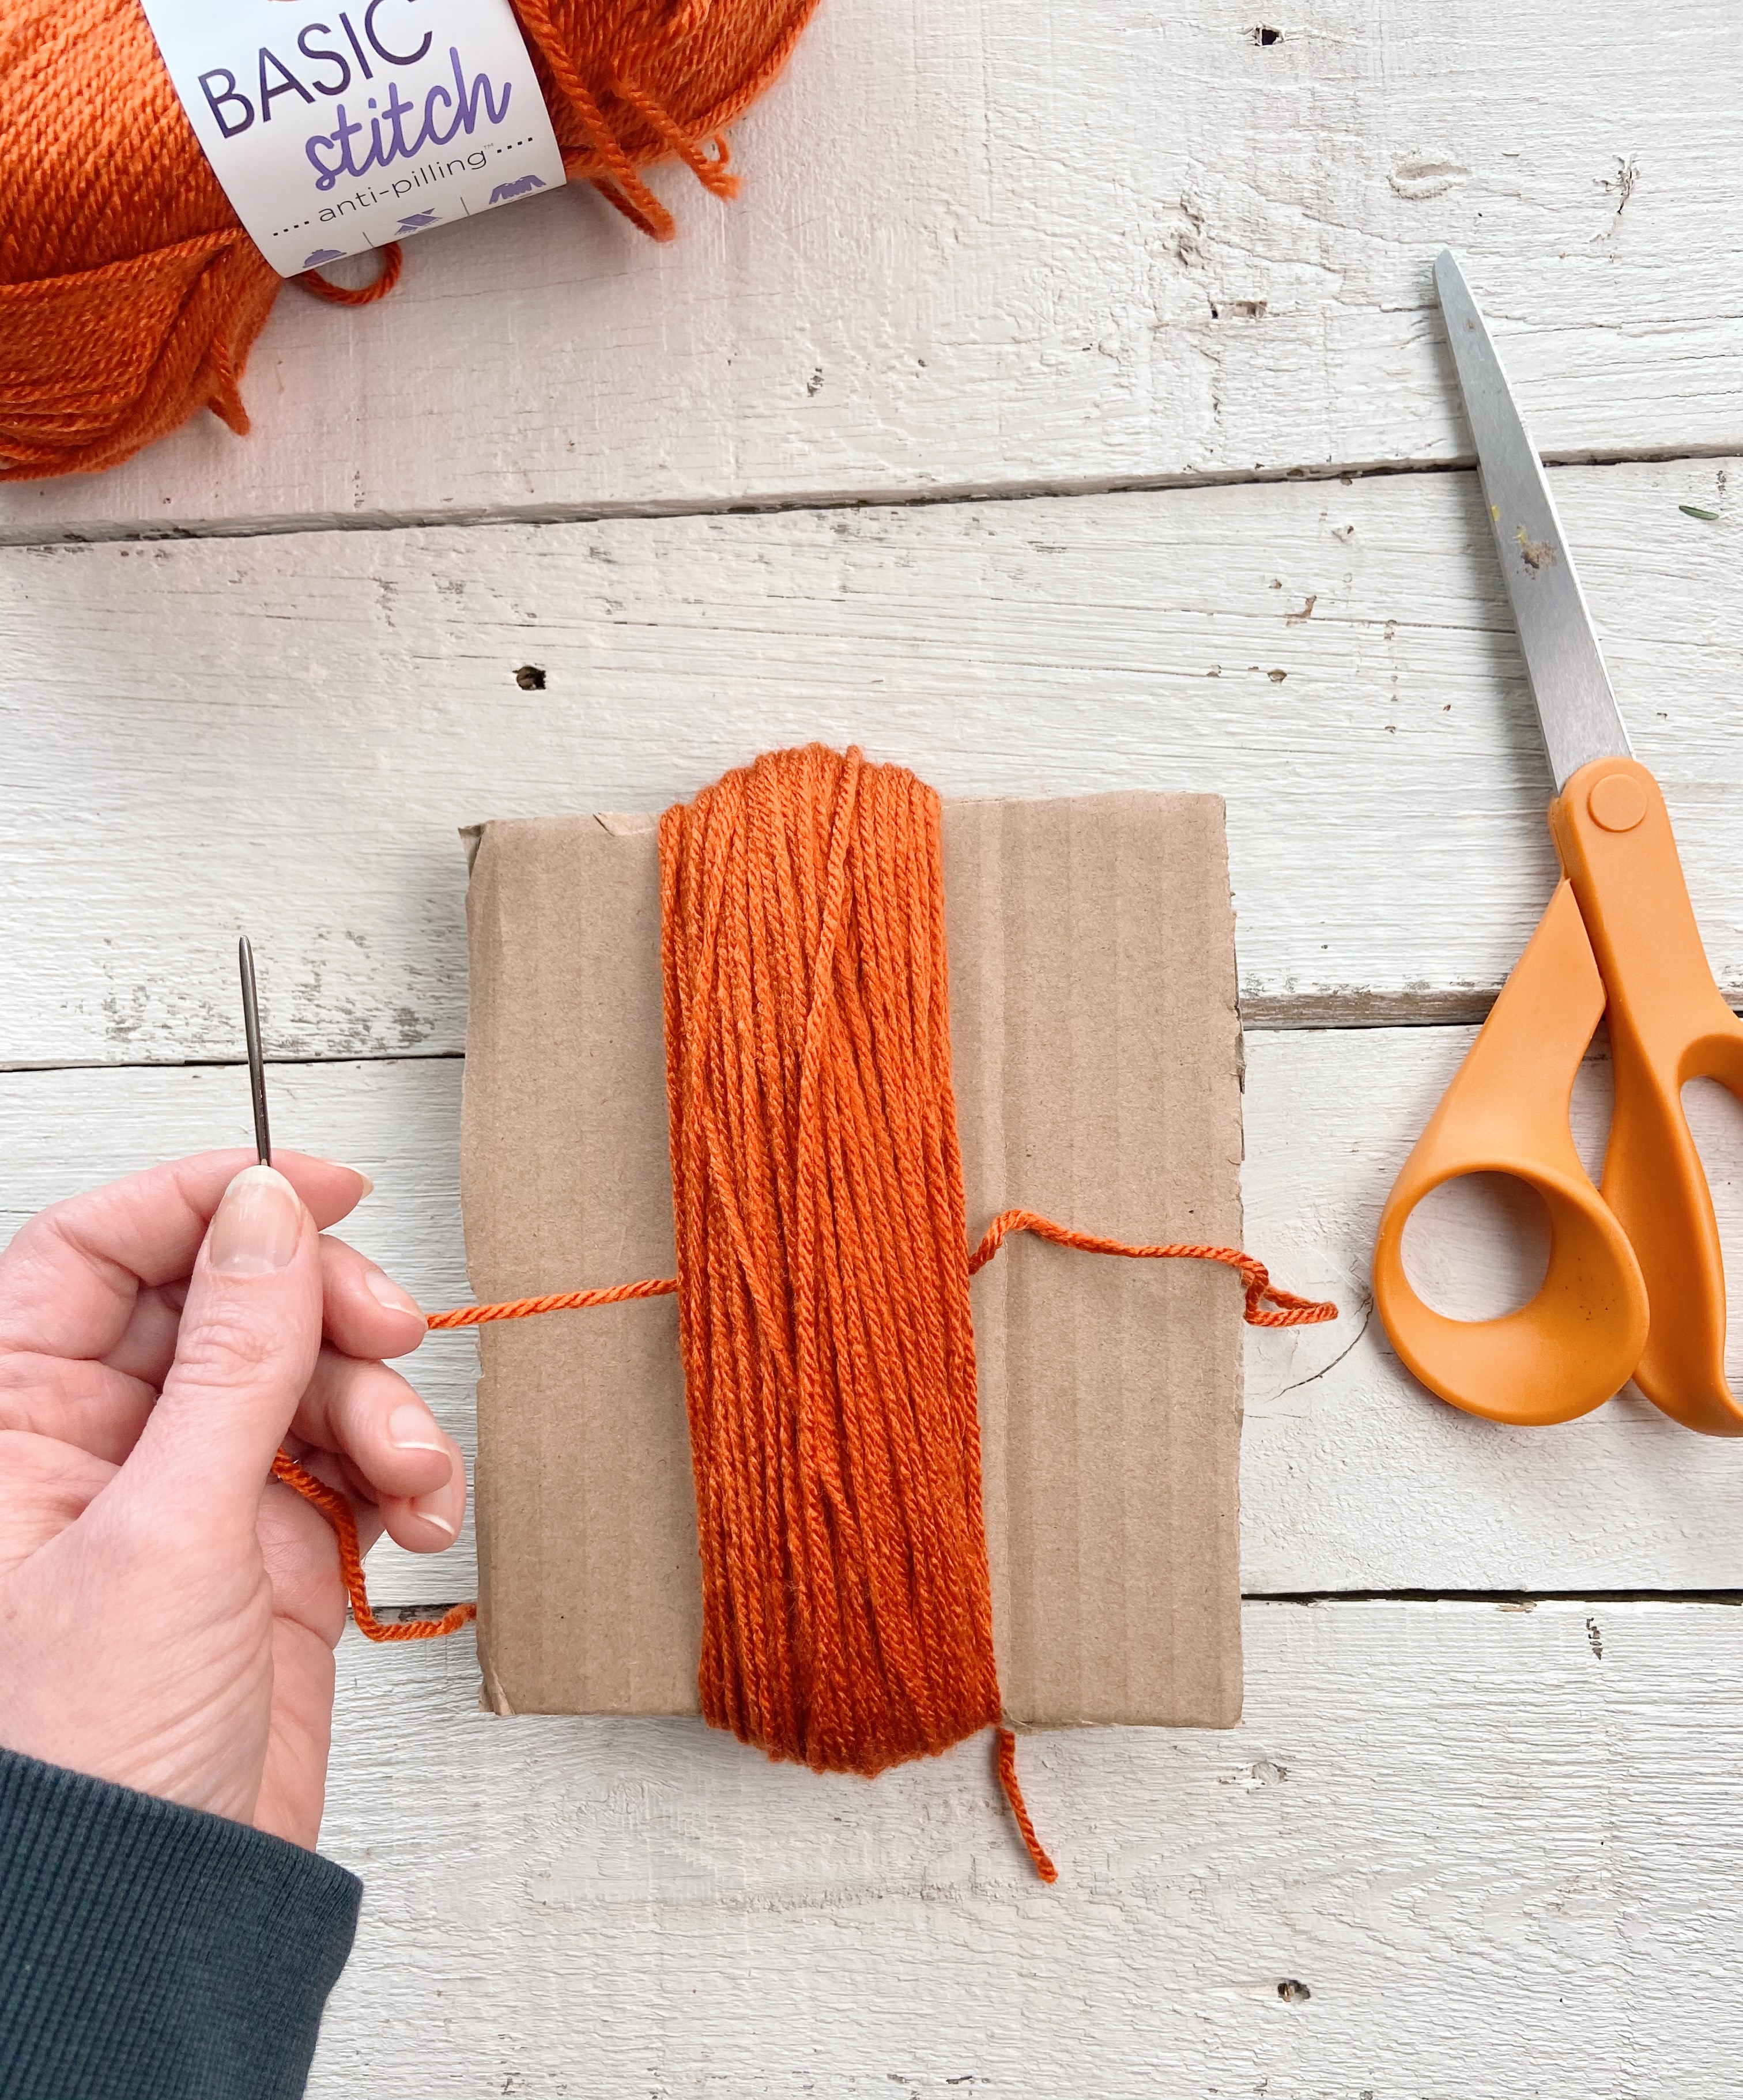
- Thread a yarn needle with a 10” piece of yarn and pass it behind the bundle of yarn on one side of the cardboard. Tie as tightly as you can in the center. Repeat this on the other side of the cardboard (this helps keep thicker pom poms from falling apart).
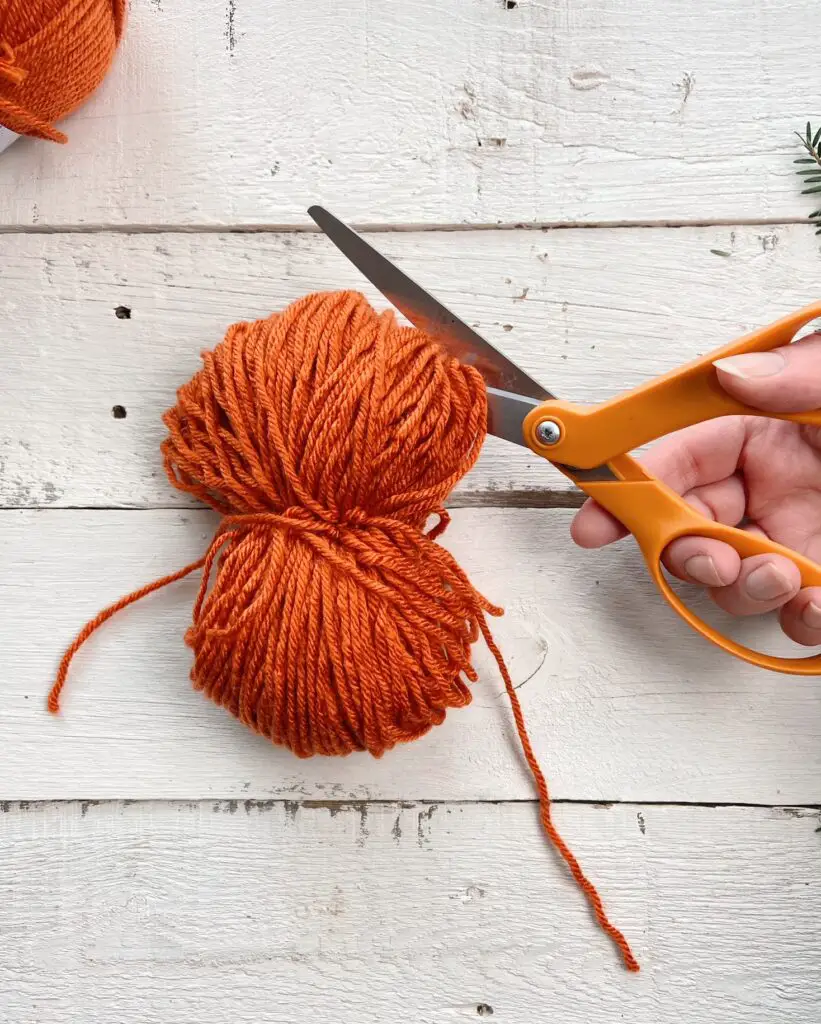
- Slide the yarn bundle off of the cardboard. Use a 15” length of yarn to wrap around the center of the whole bundle and tie tightly to secure. Leave the tails long, this will be what you use to attach the pom pom to your hat.
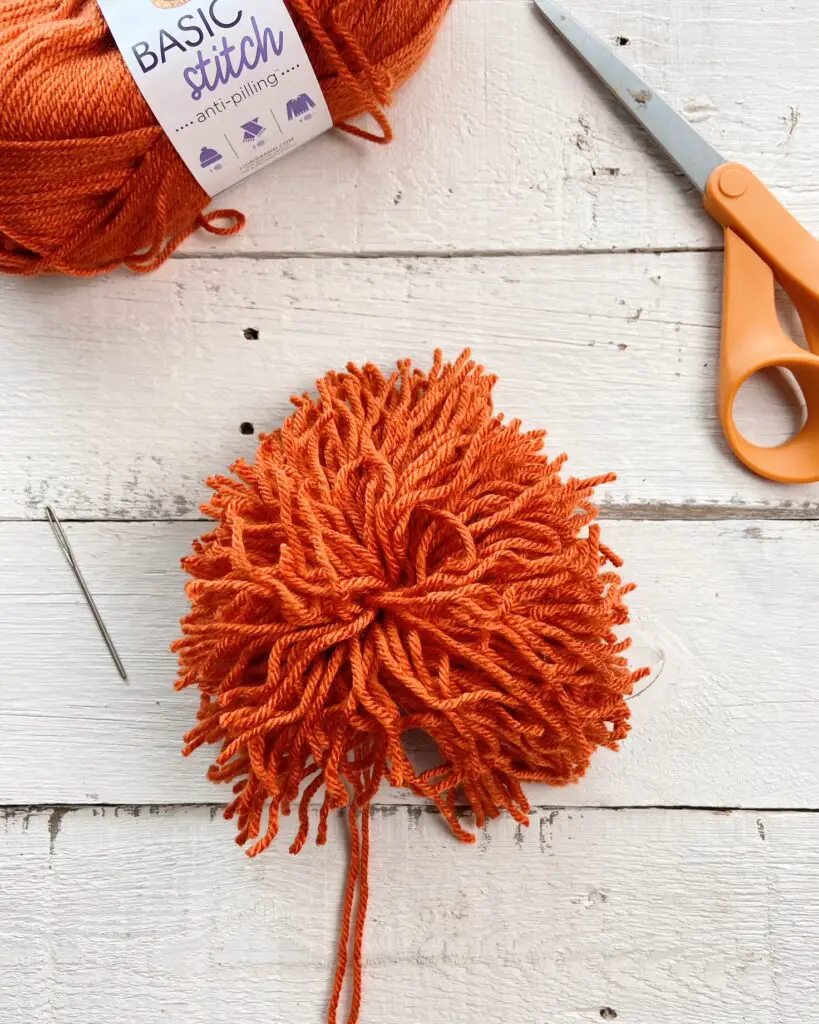
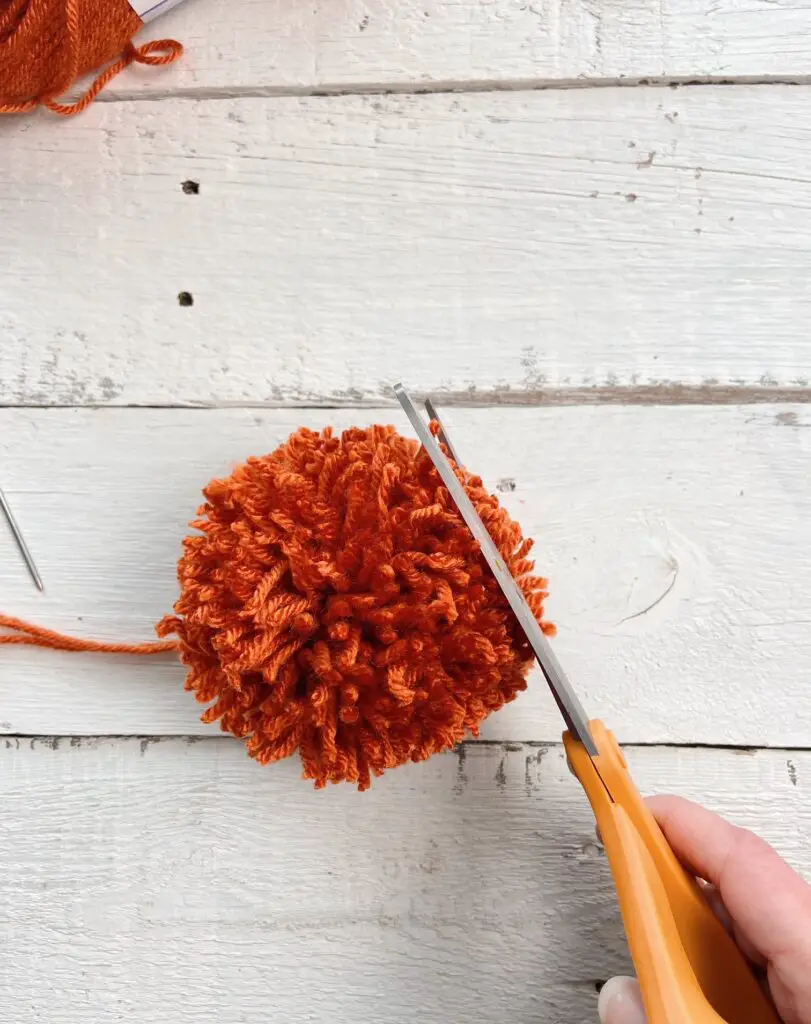
- Use sharp scissors to cut the loops on either end of the bundle. Fluff yarn and use scissors to trim and shape pom pom, being careful not to cut the long tails. Turn the pom pom all around as you shape to get a more even ball. The more yarn you trim off, the denser your pom pom will be. Use the long tails to secure pom pom to the top of your hat.
I hope you enjoyed this pattern! Tag me on Instagram @theknottednest and use the hashtag #thebuddybeanie to share your project! Find more project ideas under the Patterns tab here on the blog!
Happy making!